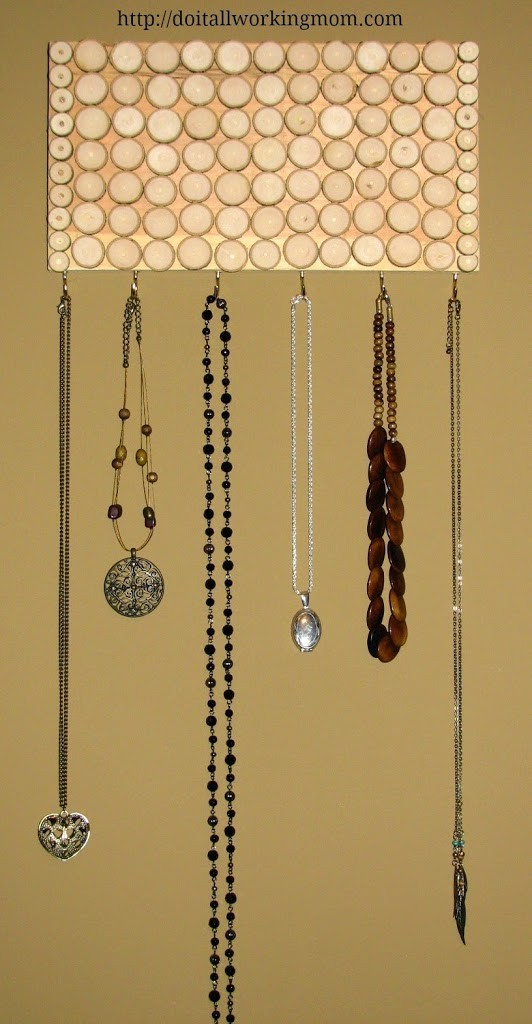
I used to have all my necklaces hanging on a hook in my closet, do you know how many times I had to untangle them? Way to often. So I decided to make a cute and cheap necklace holder. (It was cheap because I had all the supplies on hand. I’m sure you can find some of the supplies in your shed, garage or basement).
I’m am going to give you all the steps to make it. You’ll see it’s really easy. If I can make this, anybody can.
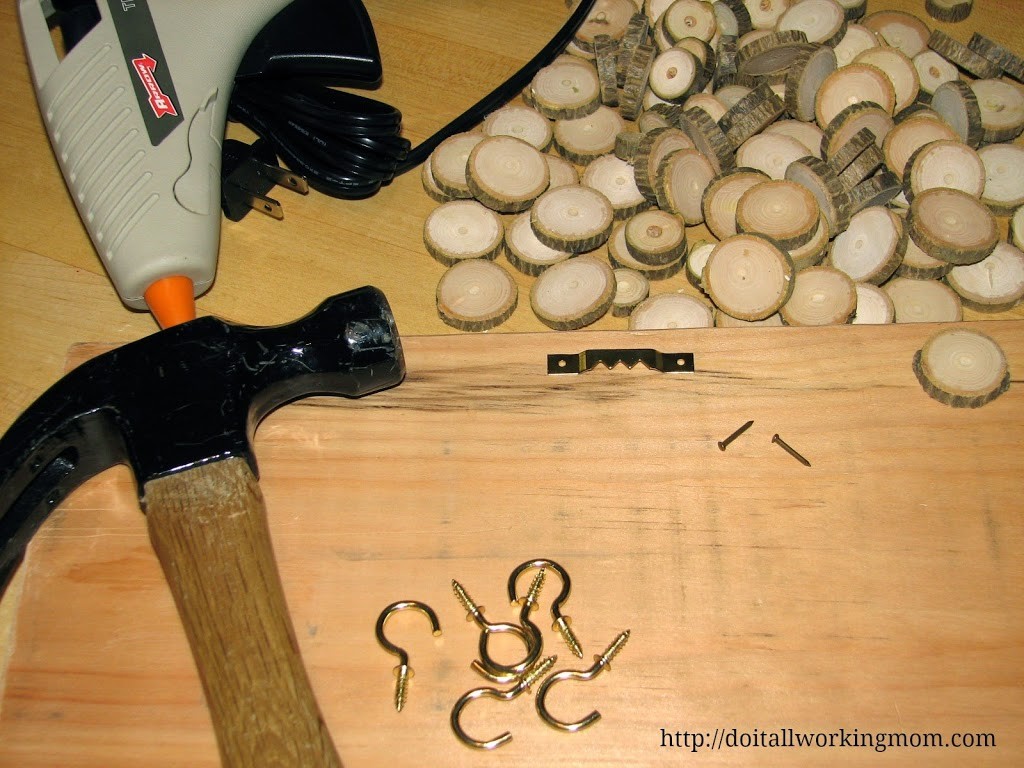
To make this project you will need the following:
A hammer
1 picture frame holder and 2 small nails.
6 little hooks (or more if desired).
A wood plaque (I used a 12″x7″ piece of wood we had in the shed).
Little slices of wood.
A Glue gun with glue.
Like I said before, I had everything I needed to make this project except for the wood slices, but husband was nice enough to cut them for me. But if you don’t live in the country like us, or you don’t have the tools to do it, here are the Amazon links to the supplies. Amazon is great, if you live in Canada and you need the links for Amazon.ca, just let me know and I’ll provide them to you.
There are only three easy steps to make this project:
1- Nail you picture holder to the back center of your wood plaque.
2- Install you hooks to the bottom part of your wood plaque trying to space them evenly (see picture above).
3- Place your slices of wood on the top of you wood plaque and create the design you want. When you are happy with your design, glue the slices of wood to your wood plaque.
And that’s it! How easy was that?
I love wood and I can’t get myself to paint it, but if you want, you can paint your wood plaque and let it dry before you glue the wood slices on it.
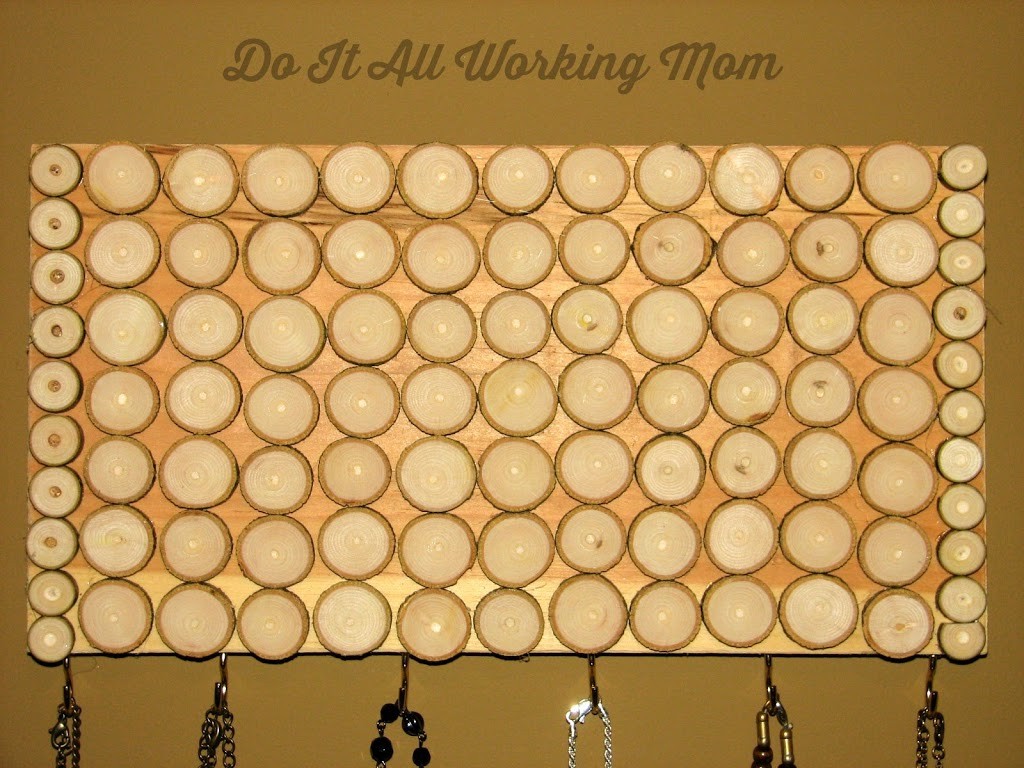
That really matches the rustic style of our home. I was really happy with the results, and now no more wasting time untangling necklaces.
Let me know what you think about this project in the comment section below.
Thanks for visiting Do It All Working Mom.
(Visited 297 time, 1 visit today)
This is really cute. It turned out so well! I like that it’s pretty and functional.
Thanks I really like it. Now I have to go shopping for more necklaces!
What a cute DIY, this is so pretty!
xx Kelly
Sparkles and Shoes
Thank you Kelly 😄
Loved this idea!! i think i am gonna give it a go because i hate when all my necklaces gets tangled with each other for being all together.
You’ll really like it! So practical.
Very cute!!! And great function. Always a good combination 🙂
Thanks! It’s really useful!
Love the rustic look of it! All of my necklaces are tangled in a box in my drawer…so I definitely need to add a necklace holder like this to my DIY list!
Thanks Kelly! I’m sure you will really enjoy it.
It looks really beautiful and decorative. I need to do something similar. Or maybe buy… I’m not very crafty 🙂
This is a great idea! Thanks for sharing it.
I’m glad you like it!
That is interesting way to store your necklaces. I am going to check out your Fall Decorating on a Budget.