• Appetizers
  • Beef
  • Breakfast
  • Chicken
  • Crock-Pot
  • Dessert
  • Drinks
  • Fish and Seafood
  • Pasta
  • Pork
  • Sides
  • Soup

Do It All Working Mom

  • Home
  • About
    • About Me
    • Privacy/Disclosure
  • Beauty
  • DIY
  • Gardening
  • Recipe
    • Appetizers-Tapas
    • Beef
    • Breakfast
    • Crock-Pot
    • Chicken
    • Dessert
    • Drinks
    • Fish and Seafood
    • Pasta
    • Pork
    • Sides
    • Soup
  • Review

DIY

DIY Cork Board Makeover

For the past couple of weeks, I’ve been rearranging and redecorating our basement. I removed everything from the walls, repainted light grey, added new curtains (see HERE), wall decorations and cushions. I now love our new basement, but I’m not done; I’m decorating the office part of it now. I promise to do a post with the before and after pictures as soon as I’m done.

I had an old cork board on the wall that I really didn’t want to put back up, so I decided to give it a makeover. Here is what I did.
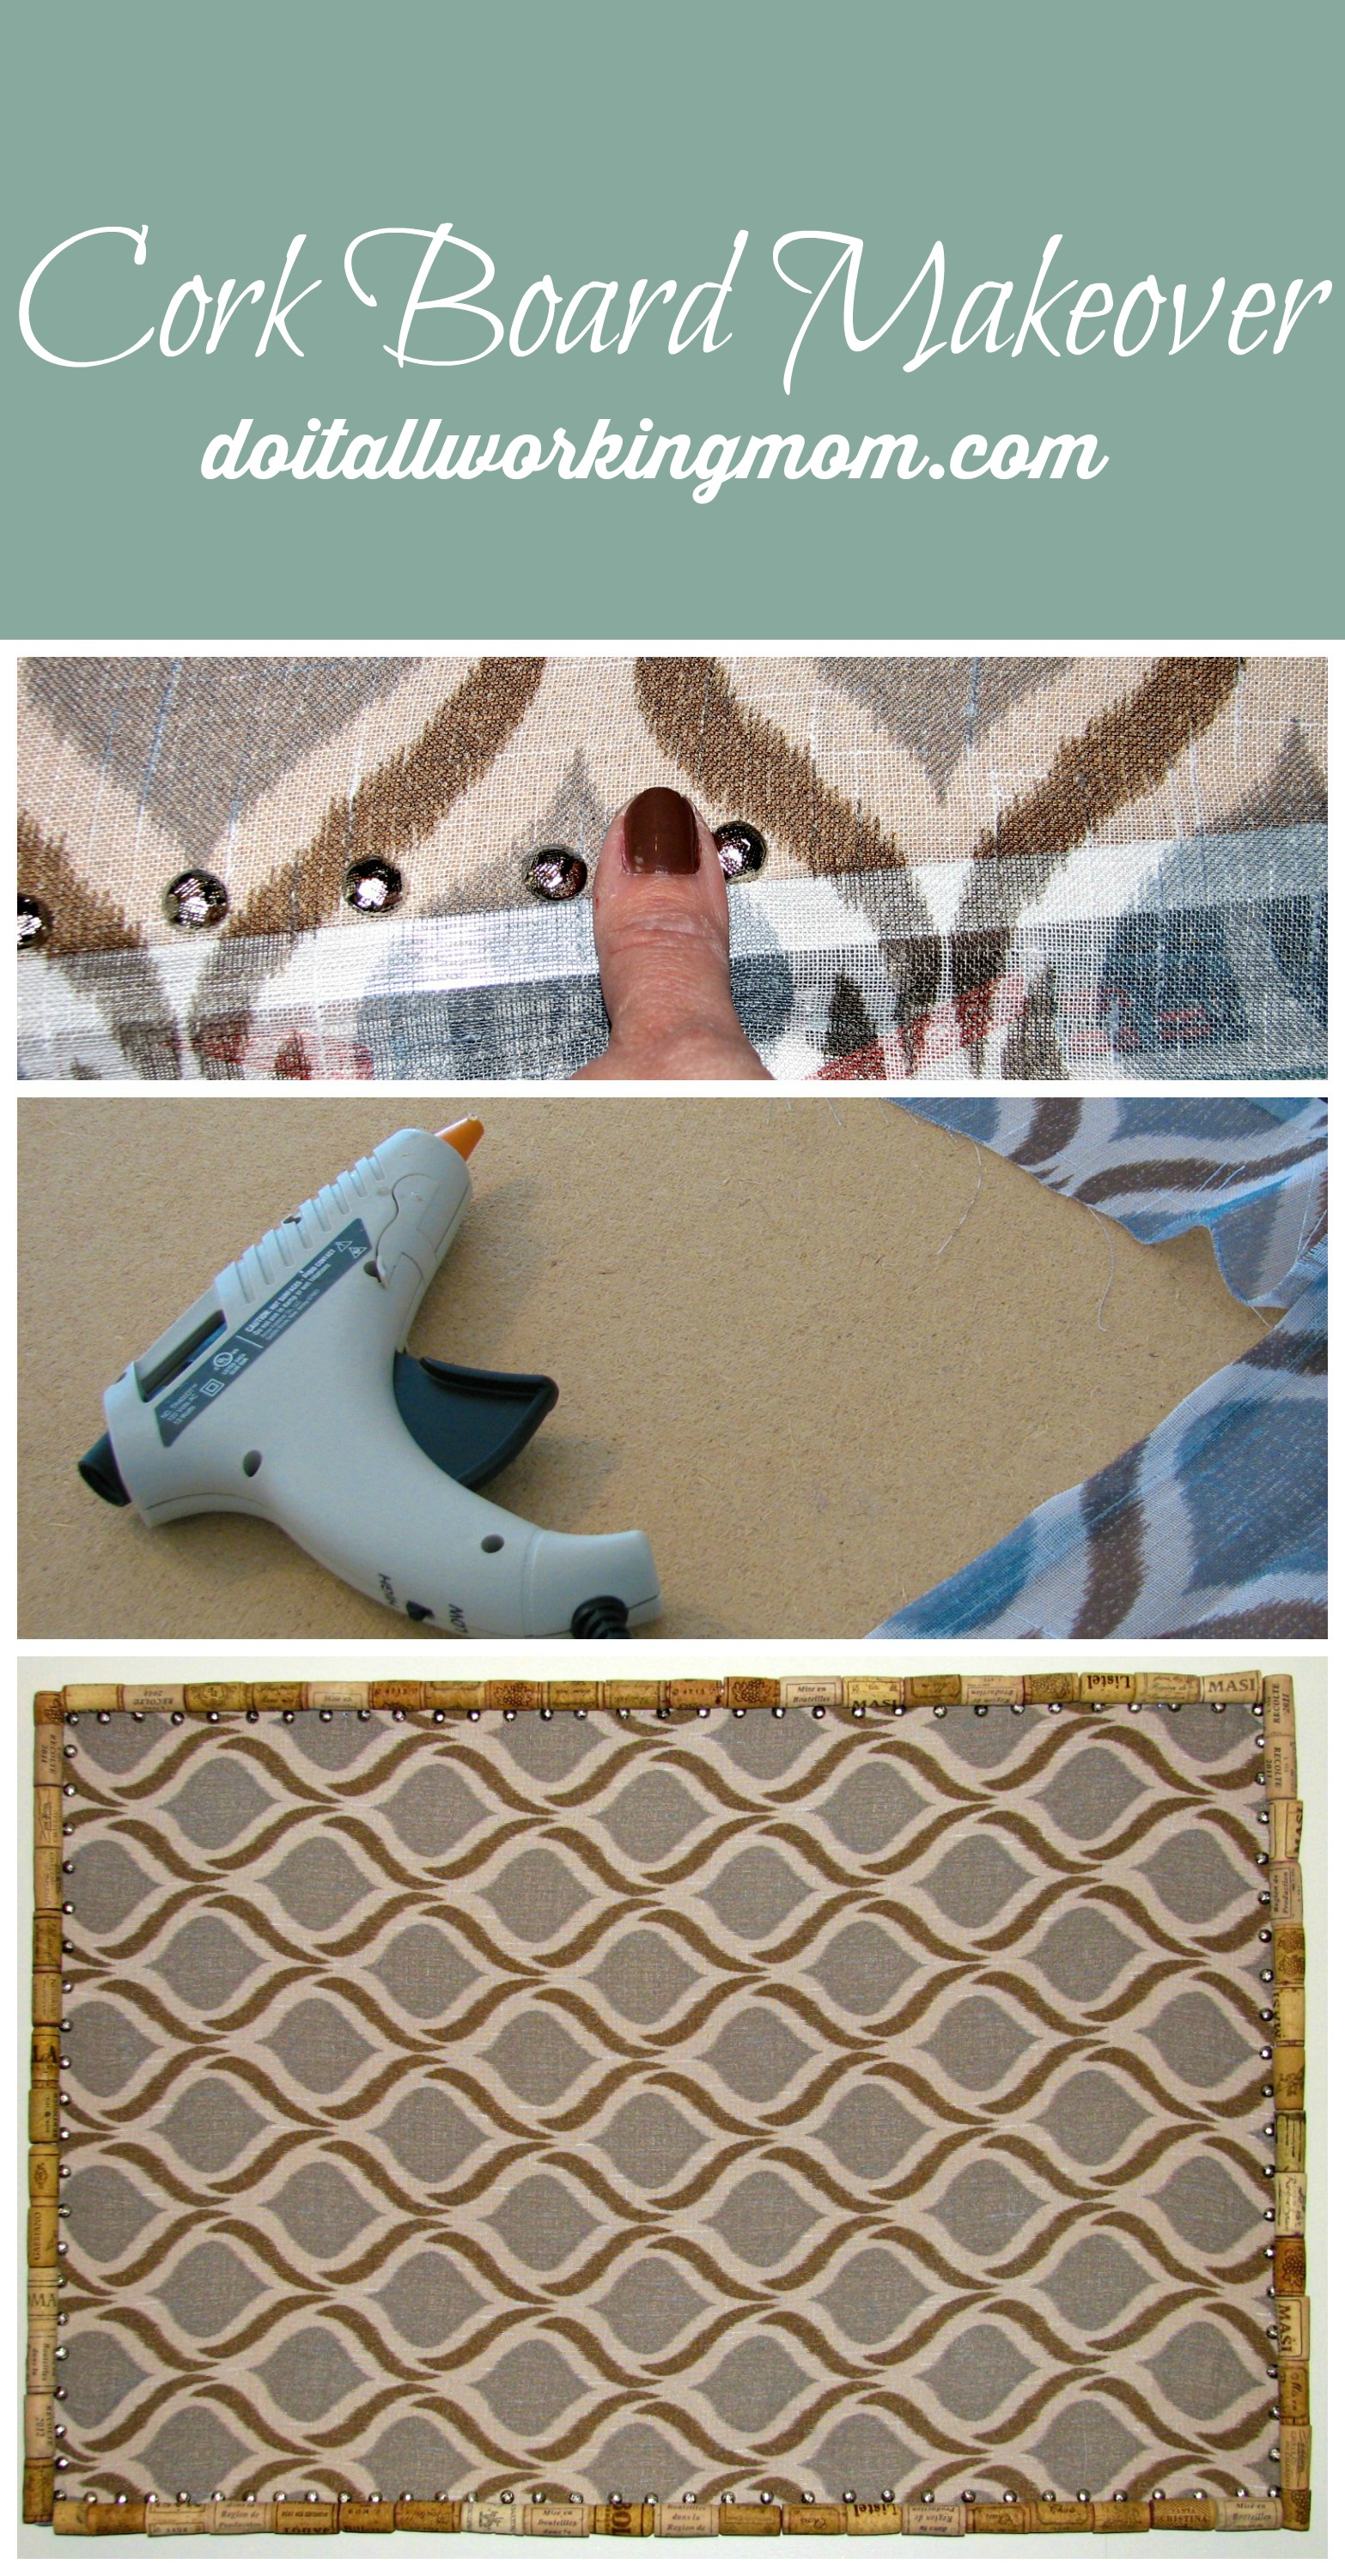
Do it all working mom - cork board makeover


Cork Board Makeover

  1. Remove the frame hangers from the back of your cork board.
  2. Iron your fabric (try using a fabric that is not see threw like the one I used).
  3. Cut a piece of fabric to fit your cork board, leaving enough fabric all around to be able to glue it to the back of your cork board.
  4. Spray the front of your cork board with adhesive spray.
  5. Glue you fabric to the top of the cork board making sure the surface is smooth.
  6. Insert your nail heads or thumb tacks all around your board using your thumb to measure spacing (if you use nail heads make sure they’re not to long or they will go threw your board and stick out in the back).
  7. Turn your board around and glue the fabric to the cork board with a glue gun.
  8. Reinstall the frame hangers.
  9. I used a glue gun and added wine corks all around my board, but that’s optional.

IMG_0462

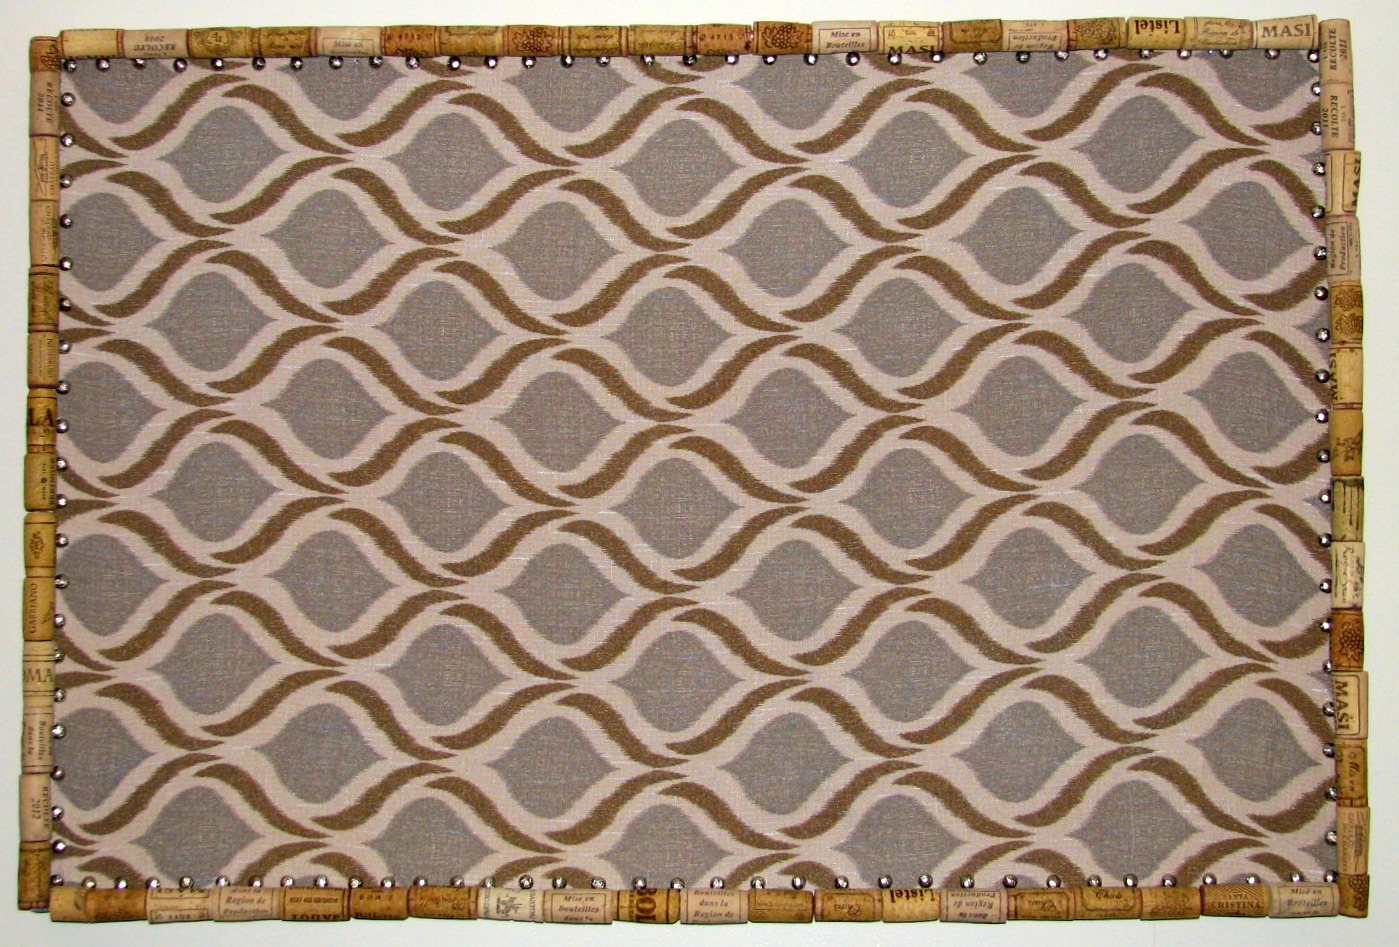
That cork board looks great hanging over my new desk. Love it!


 Thanks for visiting Do It All Working Mom.


(Visited 1,204 time, 3 visit today)


« Cannellini Bean Dip and Home Made Pita chips Recipe
DIY Valentine’s Day Canvas Heart »

Comments

  1. Terry says

    January 30, 2015 at 2:06 am

    My kitchen is done in the wine theme. The wine corks around the cork board would work so well in it. I need to try and make one of these. Was it easy peasy?

  2. Jen says

    January 30, 2015 at 2:44 am

    This is really cool! I am going to have to get these materials!

  3. Lesley says

    January 30, 2015 at 1:39 am

    That is a super cute idea. I wish I was more crafty. This would be pretty anywhere in the house.

  4. Emily says

    January 30, 2015 at 6:12 pm

    What a fun idea! I need to make one of these to hang in my kitchen!

    • Caroline Barnes says

      January 31, 2015 at 12:18 pm

      Yes I could also make one to post the kids activities and chores.

  5. Michele says

    January 30, 2015 at 8:48 pm

    What a really good idea to use fabric to cover up the cork board itself and make it look pretty and different. Not sure I could make this but I sure would like to try!

    • Caroline Barnes says

      January 31, 2015 at 12:17 pm

      Thanks you, it does look a lot better in my office.

  6. Scott says

    January 30, 2015 at 4:10 pm

    I remember my parents making cork boards back in the 70’s. I’ll bet if I look it is still around somewhere.

    • Caroline Barnes says

      January 31, 2015 at 12:18 pm

      It’s really practical and now mine is pretty!

  7. Katherine says

    January 30, 2015 at 9:00 pm

    Now that is adorable! I really like the makeover!

    • Caroline Barnes says

      January 31, 2015 at 12:17 pm

      Thanks

  8. Debbie Denny says

    January 31, 2015 at 3:52 am

    That is awesome. Fantastic idea.

    • Caroline Barnes says

      January 31, 2015 at 12:16 pm

      Thanks

  9. Tough Cookie Mommy says

    February 1, 2015 at 3:04 am

    This is such a great art project. I love cork boards because they are such versatile decorative pieces and you can add what you want to them.

    • Caroline Barnes says

      February 1, 2015 at 5:30 pm

      Thanks!

  10. denise low says

    February 19, 2015 at 1:06 pm

    This is really neat. Thanks for the information.

  11. susan king says

    February 25, 2015 at 7:43 pm

    Some people can find a use for anything and this one turned out great ! I love to see ideas when they’re finished.

Click the photo below to visit my Younique Website


Welcome to Do It All Working Mom. I'm Caroline and I'm a busy working mom of 2. I work full time and I also really enjoy being a Younique presenter. I love to cook, garden, entertain and I enjoy a nice glass of wine. I will be sharing with you easy recipes, DIY and beauty tips for all the busy moms out there.

Follow on Instagram

Visit Caroline Barnes - Do it all working mom's profile on Pinterest.
my foodgawker gallery
Shop the Ray-Ban New Arrivals @ Ray-Ban.com! CA

Popular Posts

  • Easy Oven Tin Foil Chuck Roast
  • Sausage Stuffed Portobello Mushroom
  • Quick Baked Potatoes on the Grill
  • Honey Chicken Drumsticks
  • Mini Omelette Muffins
  • 3 Easy Fondue Dipping Sauces
  • Marinated Grilled Chuck Roast
  • Easy Tin Foil Potatoes on the Grill
  • Easy Crock-Pot Pork Chops and Vegetables
  • How to Host a Raclette Dinner Party

Copyright © 2025 · Divine theme by Restored 316

Copyright © 2025 · Divine Theme on Genesis Framework · WordPress · Log in